

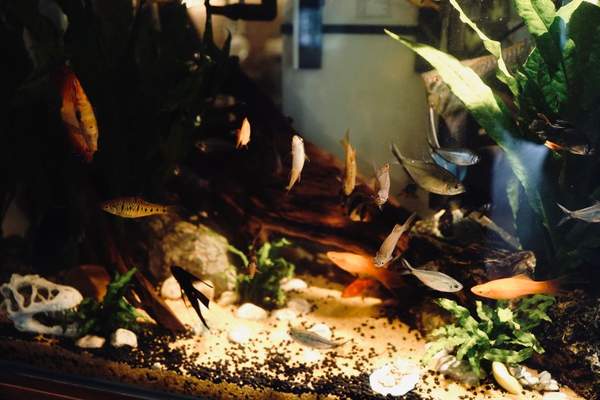
A freshwater aquarium can look finished on day one, but a safe home for fish takes longer to build. Beyond the gravel and plants, an established biological filter processes the waste fish produce. This freshwater aquarium setup guide puts those invisible essentials first, helping beginners build a stable tank rather than rushing to add livestock.
Step 1: Choose a Suitable Tank and Location
Decide which fish you hope to keep before buying the aquarium. A rectangular tank around 20 gallons (75 litres) is often more forgiving than a tiny bowl because its larger water volume tends to be more stable. Still, it will not suit every species. Research adult size, swimming space, group requirements, and compatibility.
Use a level stand designed for the aquarium’s full weight. Water weighs roughly one kilogram per litre, before counting the glass, substrate, and decorations. Position the tank away from direct sunlight, heating vents, and heavy foot traffic. Leave space for maintenance and arrange power cables with drip loops.
Step 2: Get the Equipment That Matters
For a basic freshwater tank setup, gather a tank and stand, lid, suitable filter, substrate, thermometer, dechlorinating water conditioner, water-testing kit, and a dedicated siphon and bucket. A thermostat-controlled heater is necessary for many tropical species; choose its setting according to your fish, not an arbitrary universal temperature.
Prioritise effective filtration over decorative gadgets. Filter media supports beneficial bacteria, while moving water helps gas exchange. Test kits should measure ammonia, nitrite, nitrate, and pH; water hardness tests also help you select fish suited to local tap water. An appropriately sized light is useful, especially for live plants.
Step 3: Build a Practical Layout
Rinse substrate and aquarium-safe ornaments in plain water according to their instructions. Never use soap or household cleaning chemicals. Arrange rocks and wood securely, with hiding places alongside open swimming space. Keep enough access to siphon debris during maintenance.
Beginner-friendly live plants can improve the layout without demanding elaborate equipment. Anubias and Java fern, for example, can be attached to rocks or wood; their rhizomes should not be buried. Choose plants that match your lighting and substrate rather than buying solely for appearance.
Step 4: Add Conditioned Water and Start Equipment
Fill slowly over a clean plate to avoid disturbing gravel. Treat tap water with a conditioner that neutralises chlorine and chloramine, following its label. Letting water sit overnight is not reliable where chloramine is present.
Install the filter and heater as directed, then turn them on when properly submerged. Check for leaks, consistent flow, and stable temperature. Run the filter continuously from this point onward, including while the tank contains no fish.
Step 5: Cycle the Aquarium Without Fish
This is the critical waiting stage. Fish waste and decaying food generate ammonia, which can damage fish. Beneficial microbes convert it first into nitrite, another hazardous compound, then into less toxic nitrate. A new aquarium usually lacks enough of those microbes to handle a normal fish population.
Fishless aquarium cycling grows the biological filter before animals are exposed. Add an aquarium-specific ammonia source according to the manufacturer’s directions. A suitable bottled bacterial culture or disease-free mature filter media may help. Keep water circulating and test ammonia and nitrite frequently, recording the results.
Ammonia may rise and fall, followed by nitrite. Do not assume the tank is ready just because its water looks clear or a certain number of days has passed. Instead, verify that the filter can process an appropriate measured ammonia dose so ammonia and nitrite return to zero within about 24 hours. Check nitrate and change some water before stocking if necessary. Cycling can take several weeks or longer.
For example, someone preparing a 20-gallon community aquarium might arrange the tank on Saturday and track test readings every other day. A nitrite spike in week two is progress, not permission to buy fish. The final test results matter more than the calendar. A dedicated aquarium nitrogen cycle guide can help explain unusual readings.
Step 6: Check Conditions and Plan Stocking
Before adding animals, confirm zero detectable ammonia and nitrite, manageable nitrate, and stable conditions suitable for the chosen fish. Check pH and hardness against species requirements. Avoid using quick-fix chemicals to force pH toward a number that does not match your water or livestock.
Plan for adult fish sizes, social groups, aggression, and swimming levels. Fish labelled “beginner-friendly” may still need specific water conditions or companions. A beginner freshwater fish species guide is a helpful starting point, but individual species research matters.
Step 7: Introduce Fish Carefully
After cycling, start with a modest first group rather than filling the tank immediately. Transport fish promptly, follow appropriate temperature-acclimation advice, and avoid adding shop water to the aquarium. Consider quarantine practices when introducing new fish.
Feed lightly at first and test ammonia and nitrite after each addition. Beneficial bacteria need time to respond to increased waste. Watch for steady breathing, normal movement, and appetite. Gasping, clamped fins, or lethargy should prompt an immediate water-quality check.
Step 8: Establish an Easy Maintenance Routine
Test water weekly while learning your tank’s behaviour, and more often after stocking changes or signs of trouble. Many community aquariums benefit from regular partial water changes of around 10–25 percent weekly, adjusted to tests, stocking, and species needs. Condition replacement water and match the temperature closely.
Siphon debris, remove excess food, and clean clogged filter media gently in removed aquarium water rather than untreated tap water. Never replace all biological media at once. Keep lighting consistent, and avoid overfeeding. A freshwater aquarium maintenance checklist makes these small jobs easier to remember.
A Stable Start Pays Off
Successful freshwater aquarium setup follows a simple sequence: select compatible fish, install dependable equipment, prepare conditioned water, establish the biological filter, verify test results, and stock slowly. Patience before the first fish usually means fewer emergencies afterward.
Frequently Asked Questions
How long should I wait before adding fish?
Fishless cycling commonly takes several weeks, sometimes longer. Wait until testing shows that the filter can handle an ammonia dose while returning ammonia and nitrite to zero.
Can I add fish after running the tank for 24 hours?
No. A day of operation may confirm that equipment works, but it does not establish a mature biological filter. Cycling first is safer.
Does every freshwater aquarium need a heater?
No. Tropical species usually require controlled warm water, while some temperate fish have different requirements. Choose equipment based on the species and room conditions.
Why is my new aquarium cloudy?
Cloudiness may come from substrate dust or a temporary bacterial bloom. Appearance cannot establish water safety. Keep the filter operating, test the water, and investigate persistent cloudiness rather than adding fish to solve it.